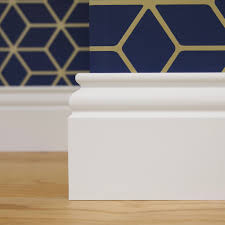
Wall panelling kits have revolutionized interior design, making it possible for homeowners to achieve professional-looking results without extensive renovation experience. These all-in-one systems provide everything needed to transform plain walls into stunning architectural features. Follow this comprehensive guide to ensure your installation is smooth, successful, and satisfying from start to finish.
Pre-Installation Preparation
1. Gather Your Tools and Materials
Before beginning, ensure you have:
-
The complete panneling kits
-
Measuring tape and pencil
-
Spirit level (at least 2 feet long)
-
Fine-toothed saw (hand saw or electric)
-
Construction adhesive and caulk gun
-
Painter’s tape
-
Sanding block or sandpaper
-
Wood filler
-
Paintable caulk
-
Primer and paint
-
Optional: Nail gun for additional security
2. Prepare the Wall Surface
-
Remove all wall hangings, outlet covers, and switch plates
-
Clean the wall thoroughly to remove dust and grease
-
Repair any significant cracks or holes with spackling compound
-
If painting, consider applying a base coat before installation
3. Plan Your Layout
-
Measure your wall and mark the center point
-
Use a level to draw straight vertical and horizontal guide lines
-
For grid patterns, calculate spacing to ensure symmetry
-
Use painter’s tape to mock up your design before cutting any panels
Installation Process
Step 1: Dry Fit and Measure
-
Place panels against the wall according to your layout marks
-
Check that corners align properly and patterns match at seams
-
Mark any necessary cuts for outlets, switches, or obstacles
Step 2: Cut Panels to Size
-
Measure twice, cut once—this adage is crucial for success
-
Use a fine-toothed saw for clean edges
-
For electrical outlets: Turn off power, measure carefully, and cut precise openings
-
Sand cut edges smooth to ensure proper adhesion and finishing
Step 3: Apply Adhesive
-
Follow manufacturer’s instructions for the recommended adhesive
-
Apply construction adhesive in a zigzag or wavy pattern on the panel back
-
Avoid applying too close to edges to prevent squeeze-out
Step 4: Install Panels
-
Press the first panel firmly against the wall, aligned with your guide lines
-
Use your level to ensure it’s perfectly straight
-
Continue with adjacent panels, checking alignment as you progress
-
Use painter’s tape to hold panels in place while adhesive sets
Step 5: Secure if Necessary
-
For added security, use finishing nails at an angle (toe-nailing)
-
Countersink nail heads slightly below the surface
-
This is particularly important for heavier panels or in high-traffic areas
Finishing Touches
Step 6: Fill and Caulk
-
Fill all nail holes and small gaps with wood filler
-
Apply paintable caulk along all edges where panelling meets the wall
-
Smooth caulk with a damp finger or caulking tool for seamless transitions
-
Allow fillers to dry completely according to product instructions
Step 7: Sand and Prime
-
Lightly sand filled areas until smooth with the panel surface
-
Wipe away all dust with a tack cloth
-
Apply a high-quality primer to all panelling surfaces
-
Pay special attention to any raw edges or filled areas
Step 8: Apply Final Paint
-
Use a brush for detailed areas and a small roller for flat surfaces
-
Apply at least two thin coats rather than one thick coat
-
Consider using a satin or semi-gloss finish for durability and easy cleaning
-
For a seamless look, paint the panelling and wall the same color
Pro Tips for Perfect Results
Accuracy is Everything
-
Check your level frequently throughout installation
-
Don’t assume walls or ceilings are perfectly straight
-
Make small adjustments as you go to prevent compounding errors
Work Methodically
-
Install panels from the center outward for symmetrical patterns
-
Complete one wall section at a time rather than jumping between areas
-
Step back periodically to view your progress from different angles
Patience Pays Off
-
Allow adequate drying time for adhesive, caulk, and paint
-
Don’t rush the finishing process—this is what separates good from great
-
If something isn’t right, fix it immediately rather than hoping it won’t show
Common Mistakes to Avoid
-
Skipping the Layout Stage: Proper planning prevents poor results
-
Insufficient Adhesive: Use enough to ensure secure bonding
-
Ignoring Level Checks: What looks straight may not be
-
Rushing the Finishing: Caulking and painting make the installation
-
Poor Cutting: Take time to make clean, precise cuts
Troubleshooting Common Issues
Gaps at Seams or Corners
-
Use wood filler for small gaps before caulking
-
For larger gaps, consider adding trim pieces
Adhesive Not Holding
-
Ensure walls are clean and dry
-
Use mechanical fasteners (nails) for additional support
Uneven Walls
-
Use shims behind panels to create a flat surface
-
Flexible caulk can bridge small irregularities
Final Inspection
Once installation is complete:
-
Check all seams and edges for smooth transitions
-
Ensure electrical outlets and switches are properly aligned and functional
-
Verify that all panels are securely attached
-
Confirm the overall appearance meets your expectations
By following this step-by-step guide, you can achieve professional-quality results that will enhance your space for years to come. Remember that the most successful installations combine careful planning, patient execution, and attention to detail. Whether you’re creating a traditional wainscoted hallway or a modern slat wall feature, your newly panelled walls will add character, value, and style to your home.